How we use AI in our process
Product, Startup
/
Sep 27, 2026
A good product can look polished and still feel difficult to use. And the problems behind that often start long before the final UI.
A team makes decisions without fully understanding how people will use the product. Engineering joins later and works from already fixed screens. Then design has to fit around technical constraints that could have been discussed much earlier.
UX-first development takes a different approach.
It brings user workflows into product decisions from the start. User needs, product risks, and technical constraints shape the work together. In practice, this affects scope, architecture, priorities, prototypes, and delivery.
The goal is to keep the intended user experience connected to every major product decision.
In this article, we’ll break the process down step by step. We’ll also look at the key artifacts that help teams make better decisions along the way.
UX-first development starts with the way people actually use a product.
The team looks at user workflows, business goals, technical constraints, and product outcomes. All of these become part of the conversation before decisions about scope, architecture, and delivery are made.
For example, a customer might ask for a new dashboard. It sounds like a UI task. But once the team looks at the workflow, they might find that users simply need faster access to one specific task.
The solution could involve navigation, permissions, APIs, or the way data is structured.

User workflows can also influence architecture in ways that are easy to miss. The way people move through a product affects data access, system behavior, performance, and integrations. This is one of the reasons why UX-first development changes SaaS architecture, especially in products with complex workflows.
The same thinking carries into delivery. The team keeps checking whether the implementation still supports the workflow and the outcome behind it.
You can also think of this as UX driven development. The idea is to keep user behavior, product goals, and technical decisions connected as the product takes shape.
Learn how it works
Complex workflows need clear product decisions before development starts.
Contact usThere’s no single straight line from research to release.
The UX-first development framework works more like a loop:
Goals - Discovery - Workflow model - Architecture - Prototype - Delivery - Validation - Improvement
Each step gives the team something to work with at the next step.
| Stage | Key question | Evidence | Decision gate |
|---|---|---|---|
| Goals | What outcome are we trying to achieve? | Business goals, baseline, user outcomes | Success signal is clear |
| Discovery | What do we know so far? | Interviews, analytics, support data, domain knowledge | Main risks are understood |
| Workflow model | How does the work actually happen? | User flows, roles, system states | Critical paths are mapped |
| Architecture | What does the product need to support? | UX needs, technical constraints, integrations | Architecture supports key workflows |
| Prototype | What should we test before building? | Interactive prototype, test scenarios | High-risk interactions are validated |
| Delivery | How should the experience work in the product? | Acceptance criteria, components, edge cases | UX intent is clear for development |
| Validation | Did it work as expected? | Usability feedback, product data, user behavior | Evidence is reviewed |
| Improvement | What should we change next? | New signals, findings, hypotheses | Next priorities are defined |
This structure keeps teams focused on decisions.
The team doesn’t have to finish one stage before touching the next. A new finding can send the team back to discovery. A technical constraint can change the workflow. A failed usability test can lead to another prototype. That’s normal. The point is to keep moving between what the team learns and what it decides.
That makes the framework useful beyond planning. It gives the team a simple way to connect evidence with decisions throughout the product development process.
Start with the result the product needs to create.
Avoid starting with a feature list. Features describe output, while outcomes describe change.
A useful starting point has four parts:
A team might start with: “We need to build a new dashboard for account managers.”
That’s an output. It gives the team something to build, but leaves the real problem unclear.
A better starting point could be: “Help account managers find overdue accounts faster without adding extra steps to their daily workflow.”
Now there’s something the team can actually work with.
The dashboard might still be the right answer. But now the team has a reason to challenge the first idea and explore other options.
The real problem could be navigation, missing filters, permissions, or slow data. Looking at the workflow first helps the team see what’s actually getting in the user’s way.
Those questions are much easier to answer once the team agrees on the outcome first.
At this stage the team just needs to agree on what should change. Features should support that change, rather than becoming the goal by themselves.
Once the team knows what it wants to change, it’s time to understand how things work today.
Start with the people closest to the workflow. Talk to users, review support conversations, look at analytics, and understand how the team currently gets the job done.
The goal is to build a realistic picture of the product, not just collect feature requests.
A few inputs can tell you a lot:
You don’t always need weeks of research. The amount of discovery should match what the team still needs to figure out.
If the team already knows the workflow and the change is small, a few focused conversations and some existing data might be enough.
If the product involves several roles, complex rules, unfamiliar users, or a major technical change, there are more unknowns to work through. In that case, deeper discovery can save a lot of rework later.
This is the idea behind discovery that validates product and technical risks. Use it to find the things that could change the product direction before the team starts building around them.
By the end of this step, the team should have a clearer picture of the current workflow, the people involved, the constraints they need to work within, and the assumptions that still need testing.
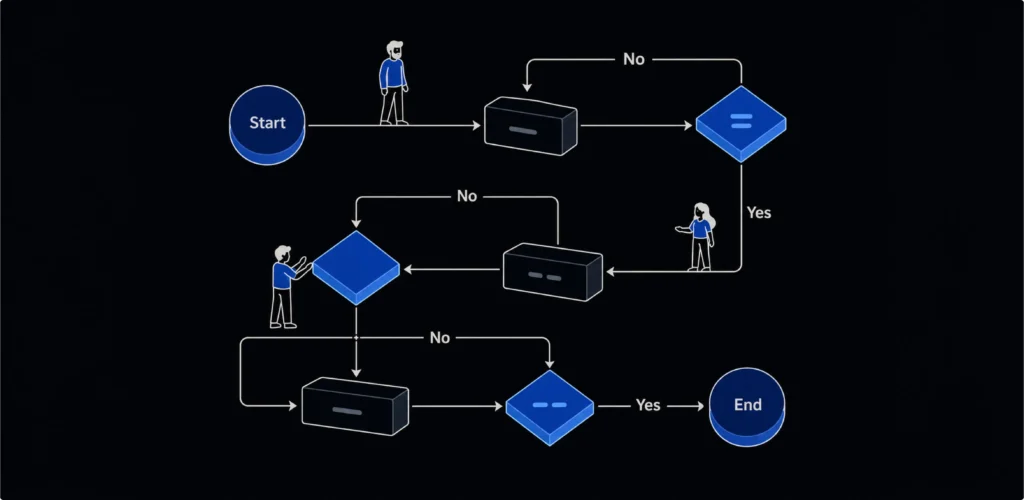
Now that the team understands the current workflow, map what the user actually needs to do from start to finish.
A good workflow goes beyond the happy path. It also shows what happens when someone takes a different route, doesn’t have permission, gets interrupted, or runs into an error.
Make sure the workflow covers:
This is why a screen list isn’t enough.
“Dashboard - Order details - Edit order - Confirmation” tells you which screens exist. It doesn’t tell you what happens when the order is already being edited by someone else, the user doesn’t have permission, or the update fails.
Imagine a fleet manager needs to assign a driver to a new delivery.
The happy path might look like this:
Manager selects delivery - chooses available driver - confirms assignment - system updates the delivery status.
But the real workflow has more to it.
What if the driver is already assigned to another delivery?
What if the manager doesn’t have permission to reassign drivers?
What if another dispatcher assigns the driver at the same time?
What if the connection drops after the manager clicks “Confirm”?
Each case needs a clear system response.
The product might show that the driver is no longer available, block the action for a restricted role, refresh the assignment status, or let the manager retry without losing their work.
Mapping these cases early gives design and engineering a shared picture of how the product should behave. It also makes the next decisions around architecture, prototypes, and implementation much easier.
UX decisions can affect a lot more than what users see on the screen.
Navigation, data-heavy tables, real-time updates, user roles, integrations, and performance all have a technical side. They can change how data is structured, how APIs work, how different parts of the product connect, and what the infrastructure needs to handle.
This is where designers and engineers need to work together.
The designer brings the user workflow and what the experience needs to feel like. The engineer looks at what the system needs to make that work. Together, they decide what should happen in the product and where trade-offs make sense.
This connection is a big part of how SaaS architecture shapes the user experience. A role-based product may need different navigation for different users. A data-heavy table may require a specific API structure to stay responsive. Real-time updates may call for WebSockets instead of regular polling.
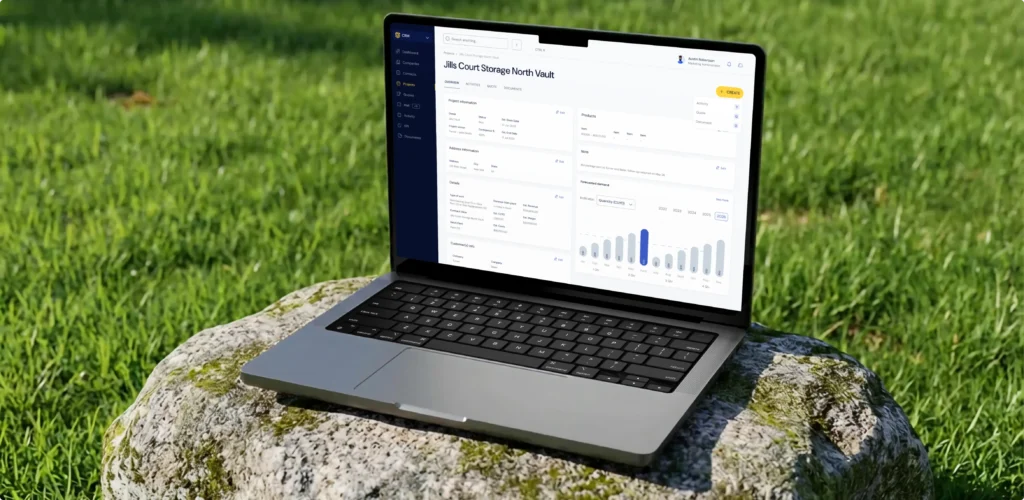
We used this approach in the Slabstack platform. The team connected role-based navigation, high-density tables, GraphQL APIs, and live updates to the underlying architecture. Some workflows needed instant sync, while others could use background polling, so the team made trade-offs based on actual user needs.
The point is to make these connections early, while there is still room to change the solution. A UX decision should give engineering enough context to build the right thing, and technical decisions should influence the experience.
You don’t need a prototype for every screen.
Start with the parts of the product where the team still has the most uncertainty. These are usually interactions where a wrong decision could create expensive rework, confuse users, or affect the whole workflow.
Think about things like a complex approval flow, a data-heavy table, a multi-step form, or a workflow shared by several user roles.
The level of detail should match the question you’re trying to answer.
If the team is still figuring out the basic flow, a simple wireframe might be enough. If you need to test interactions, navigation, or complex states, a more detailed prototype makes more sense.
The prototype should also cover the states that could cause problems later:
Then decide what you actually want to learn from the test.
Can users find the right action?
Do they understand what will happen next?
Can they recover from a mistake?
Can they complete the task without help?
Those questions are easier to test than “Do users like this design?”
This helps the team validate critical flows before development when changing the solution is still relatively easy.
A good prototype answers a specific product question. You don’t need to prototype everything to find the decisions that need more confidence.
A good design can easily lose its intent during development.
To avoid that, designers and developers need to stay connected after the screens are approved.
Start with clear acceptance criteria. They should explain how the experience should work, not just what the screen should look like.
Keep design and engineering work in a shared backlog too. This makes it easier to track UX decisions, technical tasks, and open questions in one place.
The same applies to component behavior and edge cases. What happens on hover, loading, error, empty, or disabled states? What changes when a user has different permissions?
Developers will also run into technical constraints. Some interactions may need to work differently than originally designed. The important part is to discuss those changes instead of making them silently.
Design QA helps catch these gaps before they reach users. Developer feedback helps designers understand what is practical and adjust the solution without losing the original user goal.
This keeps development aligned with validated user workflows and lets the engineering team make sensible technical decisions.
The goal is to keep the reason behind each UX decision clear, even when the final implementation looks a little different from the original design.
Keep UX connected to development
From validated workflows to working software, design and engineering need to stay in sync.
Contact usShipping the product doesn’t mean the UX work is finished.
Once real users start using the product, you can see things that prototypes and testing could miss. Some problems only show up in real workflows, with real data and real usage patterns.
Start with a mix of usability evidence and product analytics.
Look at whether users can complete the main task, where they make errors, and how long it takes them to get to the intended outcome. Product analytics can show adoption and usage patterns. User interviews, support messages, and other qualitative feedback can explain what is happening behind those numbers.
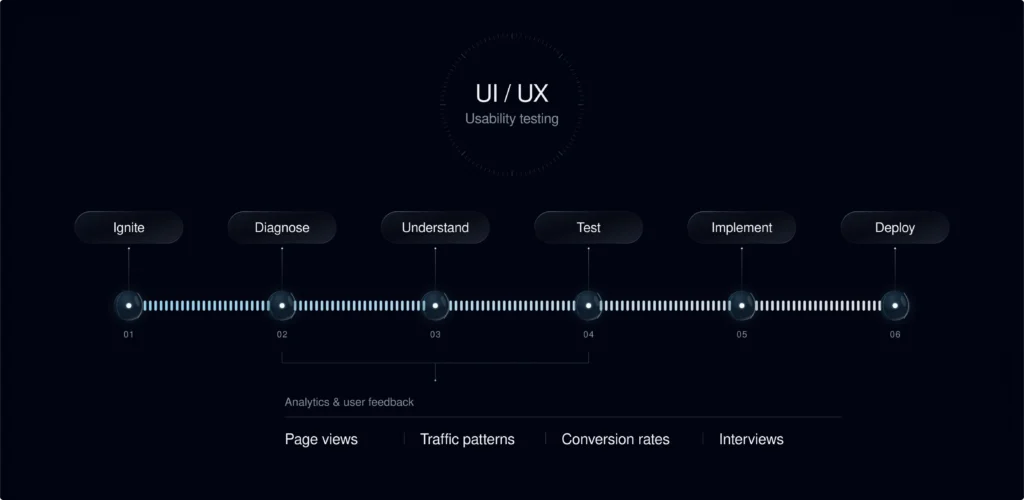
It also helps to separate two questions.
Did the experience work after launch?
Look at task success, errors, usability issues, and early user feedback. This helps the team catch problems while they are still close to the original release.
Did the product create the expected outcome over time?
Look at adoption, time to value, retention, and other product signals that match the original goal.
Conversion can be one of those signals, but it shouldn’t become the definition of good UX. A higher conversion rate doesn’t tell you whether users understood the workflow, completed tasks easily, or had to work around confusing parts of the product.
The useful picture comes from combining behavioral data with what users actually say and do.
That gives the team enough evidence to decide what needs fixing, what is working, and what should be tested next.
Once you have evidence from real users, the next question is: what should the team do with it?
Start by looking at what the data and user feedback are telling you. Users might be abandoning a key workflow, reporting the same problem, or simply not adopting a feature as expected.
Then look for the cause. Don’t jump straight from “users are struggling” to “let’s redesign the screen.” Check the workflow, user feedback, analytics, and technical context first.
From there, form a hypothesis about what could improve the situation. Define what you expect to change and how you’ll know if the change worked.
Then look at impact and risk.
How many users are affected?
How important is the workflow?
What would it take to change?
Are there technical dependencies or other product areas that could be affected?
The answers can then feed into the roadmap. Some findings may need an immediate fix. Others can become experiments, follow-up research, or future product work.
For example, if users abandon a quote workflow, the team can trace where they drop off, check why, test a simpler flow, and measure the result. If the change works, it goes into the roadmap. If it doesn’t, the team has new evidence for the next decision.
That’s what makes UX-first development an ongoing way of working. The team keeps using user evidence to decide what to build, change, test, or leave alone.
UX-first development can quickly turn into a pile of documents.
You don’t need that. Keep only the things that help the team make a decision or answer an important question.
The core set is usually enough:
| Artifact | Decision it supports | Owner | Ready when |
|---|---|---|---|
| Outcome statement | What are we trying to change? | Product | The target user and business outcome are clear |
| Assumption map | What are we still unsure about? | Product + Design | Key assumptions and risks are visible |
| Workflow | How should the user and system move through the task? | Design + Product | Main paths, states, and roles are mapped |
| Prototype | Does the proposed interaction work? | Design | The riskiest decisions can be tested |
| Architecture decision | How should the system support the experience? | Engineering + Design | Key technical trade-offs are understood |
| Acceptance criteria | What should the implemented experience do? | Product + Engineering + Design | Expected behavior and edge cases are clear |
| Measurement plan | How will we know if it worked? | Product + Analytics | Success signals and how to track them are defined |
The team does not need all seven for every task. A small UI change may need only acceptance criteria and design QA. A new product may need the full set.
And these don’t need to be long documents. Sometimes a simple flow diagram or a few notes are enough.
The point is to give the team something useful at each stage. If nobody needs a document to make a decision, there’s probably no reason to create it.
That keeps UX work connected to the product instead of turning it into paperwork.
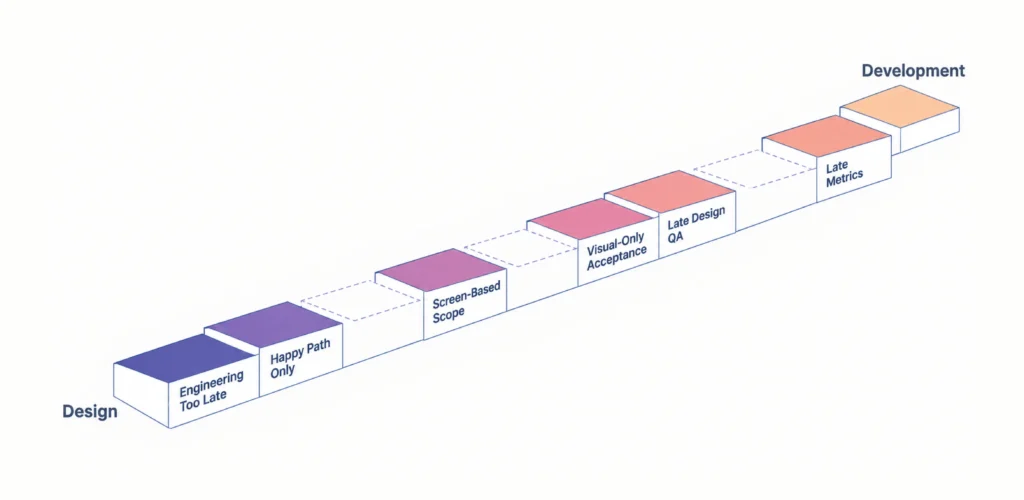
A product can leave Figma looking great and still lose the UX along the way. Usually, it happens through a few common patterns.
When engineers see the design only after it’s finished, some decisions are already hard to change.
A designer might create an interaction that looks great but is difficult to support with the existing architecture, APIs, or data.
It’s much easier to catch these things early. Designers and engineers can review important workflows together and talk through technical constraints before the design is locked.
That was part of how we worked on Activate. UITOP brought designers and developers together as one team and built a custom interface framework around the actual technical stack. The design library reflected what the development environment could support, so designs were ready for implementation from the start.
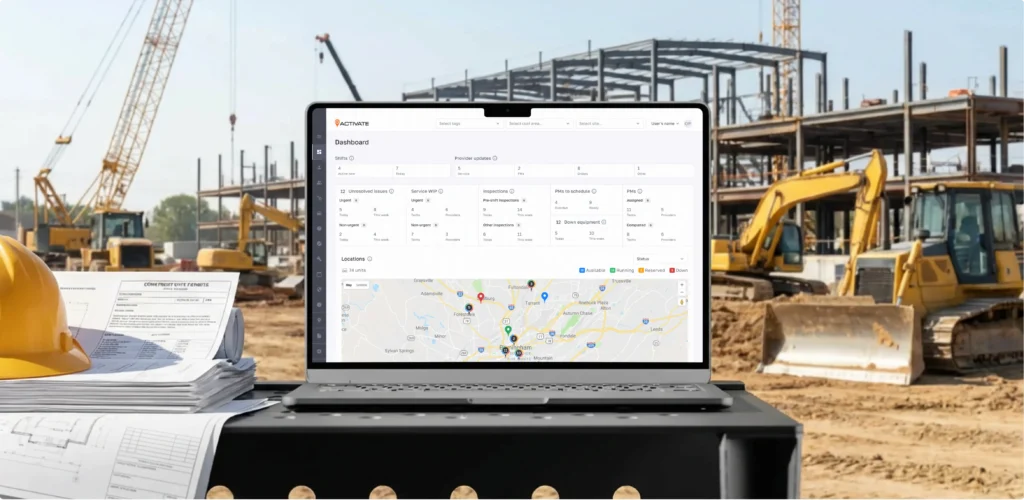
This helped the team reach 100% design-to-code implementation success and 3X faster software releases.
A design can look complete while leaving a lot of questions unanswered.
What happens when there’s no data?
What if an action fails?
What does the user see while something is loading?
What changes for different roles?
These details often show up during development, when changing the original solution takes more time.
For important workflows, define the key states before development starts. Loading, empty, error, success, and permission states should be part of the experience from the beginning.
“Build 30 screens” sounds specific. It doesn’t say much about what those screens actually need to do.
One screen can have several roles, actions, states, and technical dependencies. Another might be a simple read-only page.
Scope should follow workflows and functionality instead. Look at the tasks users need to complete and what the system needs to support along the way.
A developer can match the Figma file perfectly and still miss an important part of the experience.
The button might look right, but the interaction could be confusing. The table might match the design, but take too long to load. An error state might behave differently from what the user needs.
Acceptance criteria should cover behavior as well as visuals. Define what users can do, what happens after each action, and how important edge cases should work.
If the designer checks the product only after everything has been built, small UX issues can pile up.
A missing state is harder to fix. A workflow might already be connected to several parts of the system. Developers may have moved on to other tasks.
Design QA works better as part of development. Review important flows as they are built and fix gaps while changes are still manageable.
Sometimes teams decide what success looks like only after the product goes live.
Then there’s no baseline, the right events aren’t tracked, or nobody knows which user behavior should actually change.
Define the main success signals before development. This could be task completion, adoption, time to complete a workflow, error rate, or another metric tied to the original product goal.
Keeping UX connected to development takes a bit more collaboration upfront. It also gives the team a much clearer path from the original user problem to the final product.
You don’t need an outside partner for every product decision. Sometimes your internal team has everything covered.
But there are situations where an extra team can make the work much easier.
A product design partner can be useful when:
In these situations, the value of an outside team often comes from connecting the pieces. They can map the workflows, work through the tricky UX decisions, and keep design and engineering moving together.
This can help the team make better decisions before rework gets expensive.
UX-first development is a way to keep product decisions connected.
The connection starts with a user outcome and continues through discovery, workflow modeling, architecture, prototyping, engineering, and validation.
The team keeps asking the same basic question:
What should change for the user, and what does the product need to support it?
That question can influence technical choices as much as design decisions. It also gives teams a clearer way to handle trade-offs.
A feature, a prototype, an architecture decision can change. The user outcome remains the reference point.
That traceability is what keeps UX from getting lost between design and development.
UX-first development connects user workflows with product and engineering decisions from the beginning. Teams define outcomes, study workflows, identify risks, and validate important interactions. Those findings influence scope, architecture, implementation, and measurement throughout the product lifecycle.
User-centered design puts user needs at the center of design decisions. A UX-first approach extends that thinking across the product development process. User workflows can influence architecture, engineering trade-offs, delivery criteria, and post-launch measurement.
UX should influence architecture when user expectations depend on system behavior. Real-time updates, complex permissions, integrations, high data density, and performance requirements are common examples. Discussing these needs early helps teams evaluate technical options before implementation becomes expensive.
The core artifacts usually include an outcome statement, assumption map, workflow model, prototype, architecture decision, acceptance criteria, and measurement plan. The exact set depends on project risk. Each artifact should support a real decision or reduce meaningful uncertainty.
Measure whether users achieve the intended outcomes with reasonable effort. Useful signals include task success, errors, time to value, adoption, support burden, and qualitative feedback. Connect these signals to product outcomes instead of relying on visual quality or one conversion metric.